Pages

Thursday, December 12, 2013

Column swirl soap - Soap Challenge


The inspiration for this soap comes from my dear husband. He has been talking about this particular colour combo for several months.


He would like to make a bright orange, green and black soap. I just didn´t have the idea for a matching scent and design...until this month´s Soap Challenge. 


This was my first attempt at Column Swirl. I wanted to try a new fragrance, Orange and Chilli. And these colours seemed just the right ones for it. I used mineral pigments and charcoal. I chose to pour across one central column - made from two wooden blocks.


Scented with a blend of Orange & Chilli, Cedarwood and a hint of Honey. Soap with buttermilk, silk and shea butter.


I asked my husband Peter why he wanted these colours, he said he likes the combination because for him it feels like energy, movement but also serenity and patience.

Saturday, October 19, 2013

Dandelion Zebra Swirl

When I first saw this technique, its name sounded mysterious as well as the technique itself. The original soap of Vinvela Ebony, who created this design, looks fabulous. I had no idea how to do it and really wanted to learn. Thanks to Amy Warden, for organizing these soaping sessions and another great choice of technique!


I started thinking about this soap in September. We were coming back from my cousin´s wedding, and went for a walk. The weather was nice and first signs of autumn around us. Beautiful colours! I decided to make a soap inspired by that view of the landscape with late afternoon sun and sky. I am really pleased with the result, the colours came out nice.


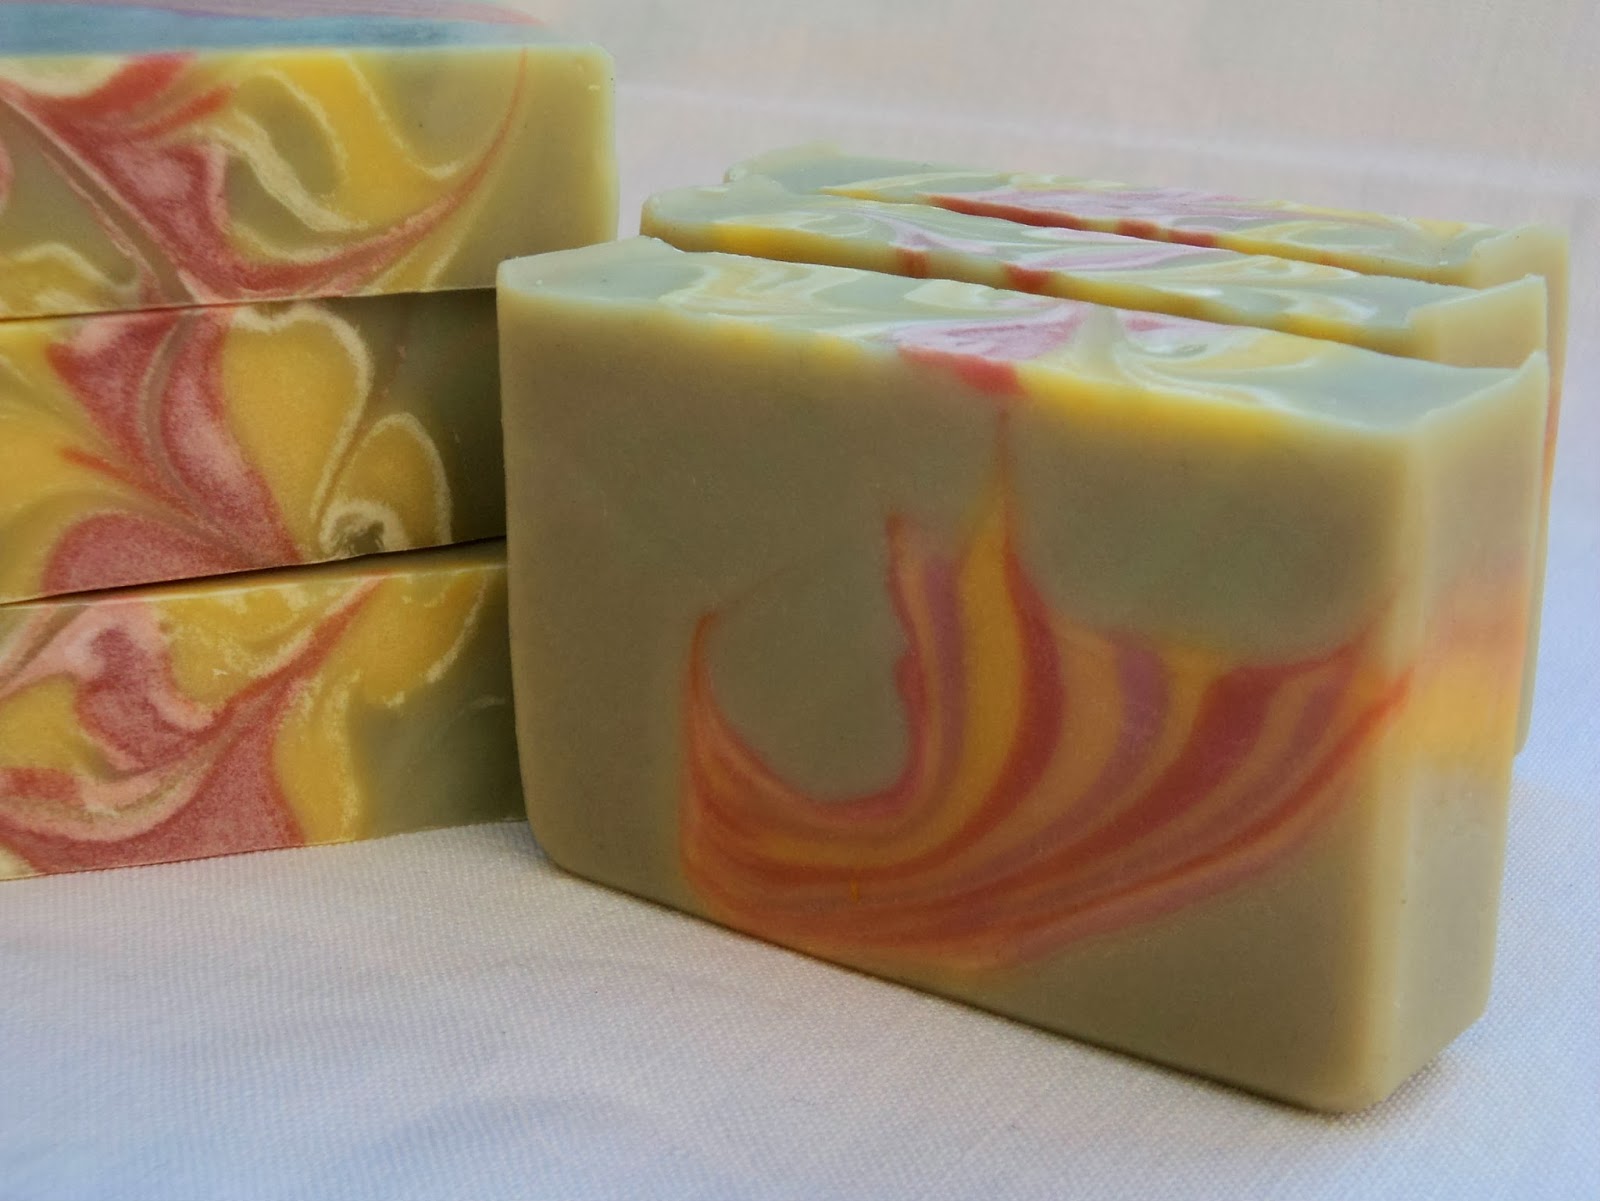
The green is mainly green clay with just a pinch of green oxide, other than that I used mineral pigments. I made the swirl with four different shades of yellow-orange-pink. On the top of the soap there is some soda ash that developped just around the ornaments, and created an interesting effect I think.


Scented with a pleasant harmonizing blend of Honey, Orange and Rosemary, a little light, a little earthy. Soap with buttermilk, silk and green clay.


I will definitely use this technique again, I like the effect of tiny stripes and the wild swirl shape.

Saturday, September 14, 2013

Soap Challenge - Gradient soap

My soap for this month´s Challenge and I am very pleased with the result.


I´ve already tried one-colour gradient before, and last month I made a similar looking soap with botanical colours and clays - a combination of different brown and orange stripes, but not really in a gradient way.


I like the colour mixing, it´s interesting to preview the shades and then to see how the colours influence each other in reality.

I wanted to make a brown  - ocean blue/green (maybe greyish) soap with an orange accent. At first I planned to mix two gradients, the brown and the blue, and to make an orange line between them, but then I saw Amy´s tutorial and started thinking about using the orange as the middle colour. I thought the gradient might be more even like that and I also wanted to see what colour the blue and orange would make.

So I decided to try it. I was expecting a nice shade of grey but the result is even better, a nice ocean green that I really like.

I made the soap on Wednesday night.


Smooth grounded scent of velvet Almond Milk and Vanilla with light sunny Mandarin and Lime. A creamy soap with buttermilk, oatmilk and white clay.


Last month I made this soap that I mentioned in the beginning, it´s a kind of gradient as well. For the colours I used different combinations/ratios of tomato puree, yoghurt, cocoa powder, turmeric and three clays - yellow, pink and red.


Desert Spice - manly soap scented with earthy Cedarwood, fresh citrus notes, eucalyptus and cinnamon.


Now looking forward to see all the other soaps!


Thursday, August 15, 2013

Holly Swirl

Amy´s Soap Challenge Club Part 3 -  the theme for this month is Holly Swirl. A technique that looks beautiful and that I have never tried, so I am in.


It took me a while to get inspiration for this soap. I had several ideas but none of them felt to be just the right one for this particular design. I went through my fragrances and nothing really caught my attention apart from Seaweed and Juniper FO. I haven´t used it so far, it has this kind of air-freshner like scent and I think it would be challenging to create a nice blend with it. So again no idea.


Walking, looking, feeling....finally an idea came to my mind.


I mixed the shades using oxides and micas, used my standard colouring-and-swirling recipe. And used the Seaweed and Juniper FO, a blend with Yellow Mandarin EO, Lavender, Cucumber FO and Cedarwood EO. I am really pleased with the result, the soap looks almost the same like in my mind and I like the scent as well, it´s very nice on skin after washing.


Fresh marine scent with a soft touch of Mandarin and Lavender, and an anchor of earthy Cedarwood. Creamy soap with buttermilk and pink clay.

Looking forward to seeing all the other soaps, I have already seen some of them...beauty. Thanks Amy!


Thursday, July 11, 2013

Mantra Swirl

When I saw the theme of this month´s Soap Challenge Club I knew for sure I wanted to participate. I really like this look and I didn´t have idea how to do it. So I was looking forward to learning this technique.

I decided to try the Original Mantra Swirl. I like that you can see the surprise inside after cutting.
I scented the soap with an FO/EO blend - fresh, marine, airy Cool Sherbert, soft light Cucumber, with a little Vanilla Cream (non-discolouring FO) and just a pinch of Cinnamon.
I coloured the soap with Ocean Green Mica, Cocoa Powder, Bright Mica, Black Oxide and TiO2. I used my favourite recipe for coloring and swirling (based on Lard, with Coconut Oil, Olive Oil, Shea Butter and Castor Oil),with White Clay and just a little yoghurt.
Added my fragrance blend and after a while the batter started to thicken and got grainy. I tried to hurry up and luckily managed to do the swirl with some improvisation. What was the cause of acceleration? I think it was Cool Sherbert FO, maybe also well-known Cinnamon (but I used just a tiny bit), and it´s hot here, so even room temperature is quite high for soaping - at least for me, I am not used to it, because here in Central Europe we have such weather only around a month in the whole year. I imagine it must be pretty hard to make soap in warmer climate areas!
In the morning the top looked good, no crackle, no separation. But many possible surprises might be hidden inside...When I cut the soap I was so happy! Every piece is different and the soap looks very close to my original idea. I am really pleased with the look and with the scent. My husband says the soap is beautiful, it´s even his all time favourite so far. I am lucky and grateful he supports me in everything I do.

I will certainly use this tehnique a lot, I like its variability. I am adding one photo of another Mantra Swirl I tried, it´s a soap named Indian Rose, scented with Patchouli, Sweet Orange, Lavender.


I´am looking forward to seeing all the other soaps, the link-up page full of colours is always wonderful.

Wednesday, June 12, 2013

Peacock swirl - new challenge

My first trial on peacock swirl. I must admit that at first peacock swirl design seemed too wild for me, even psychedelic.
But I signed up for the challenge mainly to try the technique and hoping to eventually embrace it. I had this same issue with  the elemental swirl, that just seemed too unorderly and "overdesigned" in the beginning. But after paticipating in Amy´s Challenge earlier this year and seeing all these painting-like soaps I now love the technique and the look!

INVENTING...
So let´s go! This time I started with the colour scheme, I wanted some 4-5 colours, nice contrasting but still decent. Maybe something like on this palette from design-seeds? Yes, that´s it. I had to order new pigments, so far I´ve been using just yellow, red and blue. This time I needed to get more green and turquoise shades.
Creating the scent took me some time. I decided to base it on Baby Powder and Vanilla. To these soft and sweet tones I added a hint of fresh, crisp tones of Mint and Lime.

PREPARING...
Regarding the recipe, I like to work with hard oils and butters, room temperature. I used my recipe for "complicated" designs - it is based on lard, together with olive oil, coconut oil, shea butter and castor oil. Added also some buttemilk. This recipe generally works for me, and creates a nice creamy coloured base.
The funny part was to get squeezing bottles. I couldn´t find any suitable here in Czech Republic! After a lot of thinking the only solution I found was to use these bottles from something called "lemon concentrate". I asked my son to buy six of these - well, he said the shop assistant looked like "why does he need 2 litres of this"?

CREATING...

I really liked the process. Everything went smoothly, just couldn´t put the caps back on the bottles at first but fortunately fixed it quickly!
My idea was a turquoise and aqua green soap with orange and white accents. I ran out of green sooner and as you can see after pouring the soap was mainly red and blue.


REVEALING...
And surprise, the blue disappeared! My first time used blue mica is apparently not stable in CP, morphed to creamy salmon. But I like the look now, it fulfills my idea of a contrasting but decent swirl. And the scent matches now the design even better.
I am pleased with the result and will definitely try this technique again. It was fun to make and I really start liking peacock swirl, already have some new ideas. Let´s see others colourful soaps now, can´t wait!


Monday, May 13, 2013

Den matek a mýdla v Táboře

V neděli na Den matek jsme vyráběli mýdla v Mateřském centru Radost v Táboře a bylo to moc prima! Když mě kamarádka oslovila s nápadem uspořádat tuhle dílnu, byla to pro mě výzva. Začala jsem hned vymýšlet, jak vše udělat a zorganizovat, a těšila jsem se, jak se to povede.

Pro účely dílny jsem potřebovala vytvořit recepturu na příjemné mýdlo, které by rychle zrálo, rychle tvrdlo, a zároveň nám dalo dost času k tvoření. A také jsem chtěla základní barvu bílou, abychom mohli dobře barvit. Zvolila jsem tedy:
základ ze sádla - dodá mýdlu tvrdost, krémovitou pěnu a jemnost
a menší díly olivového oleje - pro zvláčňující účinky
a kokosového oleje - pro tvrdost a bublinky
Použila jsem 8% nadbytek tuků - ty budou v mýdle obsaženy v nezměněné formě pro větší jemnost a šetrnost. Pro začátek zkusíme mýdlo bez parfému. Ale přidáme naopak sušené mléko, abychom měli více bublinek a jemnosti. Tak vše naváženo, připraveno, nabaleno a jdeme na to.
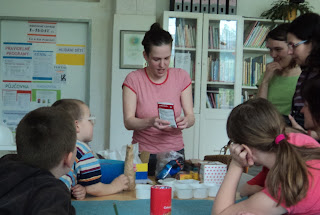
V mateřském centru se nás sešlo pár maminek a několik vědecky zaměřených dětí, které byly do mýdel opravdu nadšené! Každý si vymyslel podobu svého mýdla s použitím přírodních barviv, aditiv a kousíčků mýdel.


Na výběr byly barvy:
zemitě zelená - prášek stevie
kakaově hnědá - kakaový prášek
lososová - paprika
hnědá - skořice
bílý základ
a také mák a ozdoby z mýdel - stroužky, kostičky, vykrájené tvary...

Zatímco ostatní vymýšleli vzhled a tvořili, já byla trochu napnutá, jak se mýdlo bude chovat, a jestli nám nepřipraví nějaké překvapení. Zároveň mě moc bavilo sledovat, co kdo vymyslí. Oblíbená volba byla stevie, a hned v závěsu kakaově hnědá, v různých kombinacích s mýdlovými ozdobami. Po plánování a přípravách jsme tedy začali míchat mýdlo, a vyšlo to. Mýdlo se chovalo parádně, vše jsme v pohodě stihli, promíchali a zalili, a už jsme měli na stole pěkně barevné a ozdobené formičky mýdel, každou jinou! Než jsme si všechno dopověděli, mýdla začala krásně tuhnout, takže jsme si je mohli vzít domů, a teď už zbývá jen čekat. Tipuji, že do 24h by mohlo být připravené ke krájení, uvidíme...

Kdy nakonec ztvrdne? Projde stádiem gelu? Kdy bude možné ho vyklopit, nakrájet a uvidět to překvapení uvnitř? Povedl se design, a jaké bude při mytí?  Najde se nějaký odvážlivec, který zkusí mýdlo olíznout, tj. provede klasický mýdlařský test bezpečnosti mýdla zvaný "zap test"? To všechno mě, a určitě i všechny ostatní účastníky dílny, moc zajímá, takže moc prosím o fotky, komentáře a zkušenosti! A kdyby se něco nevyvedlo, nebojte se se o výsledek podělit, při výrobě mýdel se často něco zvrtne i profíkům a je to stejně zajímavé, jako úspěchy! Vše uvidíte v dalším příspěvku na blogu.

Na závěr bych chtěla všem poděkovat za účast, bylo to moc fajn a ráda si podobnou dílnu zopakuji, možnosti mýdlařiny jsou nekonečné. Hlavně děti mě svým nadšením nakazily a příště třeba zkusíme vymyslet něco bezpečnějšího i pro ně. Mějte hezký den a ať žije mýdlo!

Tuesday, April 30, 2013

Soap Challenge - Final Week


The  leopard spots technique looked really challenging from the beginning, especially with the slowly moving batters that I have had lately! But I couldn´t wait to try it...


I wanted to create a summer, fruity soap. I made a blend of FO/EOs, the dominant tone was grapefruit. My plan was yellow soap with pink and orange spots, and a purple swirl on the top. I chose one of my regular recipes and prepared a stick-blender as I wanted to secure reaching a thick trace. But as soon as my FO/EO mix touched the bowl my soap seized immediately, I didn´t even have time to get surprised! My first seizure!
I wanted to at least colour the soap and to blob it in the mold but the colours didn´t  incorporate so I had to HP it - again for the first time! It was one of the FOs for sure, Green Apple is the greatest suspect. I didn´t know how the scent would hold in the oven, it was very weak so before putting the soap in the mold, I added a little more of this damned Green Apple. After unmolding, my son said it reminded him of something. Yes, it looks like "paté" (I don´t know how to say in English, it´s made from meat and you eat it with bread). It´s funny that so many soaps turn out to look like a sort of meat!
So let´s start again. I had to chose a different scent (obviously not only because I ran out of some FOs). I didn´t give up my idea of fruity soap, so I tried a combo of Watermelon, Cucumber and Lemon, anchored with Cedarwood. This time the trace got thick quite fast as well, but it was manageable. I mixed in the colours and went on the piping. It wasn´t easy at all. I think it is crucial to have thick trace and a good piping bag. With the thick trace I got I had to make a different top, but I like it.
Of course that I got air bubbles, but overall I am pleased with the look, and the scent gets better and better with time. The yellow turned out not as bright as I wanted, but it´s a kind of fruity pineapple yellow and goes well with the fresh scent. Do you want to see the other colourful leopards? You can find them on Great Cakes Soapworks.

I am so happy that I joined the Challenge, I learned a lot! The best thing is to share with others, our stories, successes and failures, to see all the different soaping styles, to read the encouraging comments...
Thank you Amy for these nice moments!


Saturday, April 13, 2013

Soap Challenge - Week 3

The third week´s challenge theme is "oil mica swirl". This is for the first time that I am trying it (the same with the other challenge techiques).
I chose to swirl with gold mica, and a combination of blue and yellow for the soap. After my last week´s fluid batter which refused to thicken, I wanted to try the ITP swirl again and decided to combine it with tiger stripes - a kind of revision of the learned techniques. This time I really wanted my soap to come to at least medium trace, so I decided to use buttermilk as usually.
For the scent I made a blend of EOs/FOs - Aloe Vera, Lemon are dominant, a little Peppermint and Lavender, with Cedarwood as a base note. I used TD to whiten the base and then coloured the soap - for the yellow I used Gold mica and a bit of Yellow Oxide, for the shades of blue I used Ultramarine, Yellow Oxide, Black Oxide and Zinc Oxide.
For the top swirl I took a little bit of olive and castor mix from the weighed oils and made quite a thick mixture with mica. At the time of swirling my soap was around medium trace and I found the thicker oil and mica mixture easy to work with.
I was lucky this time - no suprises, the soap behaved properly (which means not many mistakes on my side) - and I am really pleased with the results! Thank you again, Amy, for me the Challenge is mainly a great way to learn and improve my skills. And of course I love looking at other´s beautiful and inventive creations!

Sunday, April 7, 2013

Soap Challenge - Week 2

From the beginning I knew this would be a very challenging technique for me! And it really turned out to be one of those soaping adventures...

My idea started with the pencil line - I decided to use golden mica. Regarding the theme and colours, I was thinking about expressing the contrast between light and dark, or yin and jang. For the scent I made a EOs/FOs blend using Almond Milk, Orange, Eucalyptus, Tea tree and Sandalwood.
The night before I had even dreamed about which recipe to use. Finally I decided for the "high percentage of hard oils" recipe as I wanted a white base and didn´t plan to use TD. I like hard oils and butters, use them a lot, usually with milk/buttermilk and no problems so far with trace. But with so many colours and swirling to do I was very careful. I prepared everything, I had a paper with written steps to be able to concentrate fully. For colouring one half I used Activated Charcoal (dark grey), Cocoa powder+AC (brown), Ultramarine+Red Ocre/Red Oxide (burgundy), for the other half White Mica (white), Yellow Oxide (yellow) and Yellow Oxide+White Clay+Red Oxide (Apricot). I didn´t plan to add any other additives, this was enough for me! I took a deep breath and started.
My oils and lye were around body temperature, after emulsification I feeled the heat and got the impression of thickening so I divided the soap to the prepared cups with colours and started stirring. I was lucky that my husband was helping me to take care of all the eight bowls and cups! And we stirred and stirred and the soap was still thin, and as we have a quite cold flat, it lost the heat. I couldn´t use stickblender in the small cups, so more stirring and stirring, I even put everything in the oven for a while and stirred again, this all for at least an hour and a half. When it finally appeared to be a little thicker I lost my patience, swirled and poured. It looked like all the colours mixed completely together and the batter was still super-thin in the mold. So straight in the oven and I had to start tidying up and doing the laundry, just tried to do other things than check the soap every ten minutes. Is it false trace? Bad lye? It behaved really strange. After some  three hours it was still almost pourable but smooth. I relaxed when I caught the soap gelling - after some five hours in the mold!
Today in the morning unmolded, after two hours cut - I was so happy to see the solid soap! My pencil line is barely visible but the colours turned out much better than I expected. I like the look, it goes well with the delicate scent. This techique was really hard for me, but a lot of fun! I will definitely try it again because I like the complex yet subtle look it gives to soaps. All of the Challenge soaps I´ve seen so far are wonderful and very original!

Today I missed swirling, I wanted to do at least a chocolate in the mold swirl when baking a cake - but men had eaten all chocolate, what a pity ;-)

Wednesday, April 3, 2013

Soap Challenge 2013 - 1st Week

Like other soapers, I love to look at soaps, to see all the different ideas and infinite possibilities. In soapmaking, every slight change of colour, scent, technique, recipe or conditions, changes the overall look...and that´s the soap! Last year as a soapmaker-beginner I discovered Amy Warden´s blog and also the Challenges, and I admired the beautiful soaps! This year, still soapmaker-beginner, I decided to sign in as well and I am so excited to try new techniques and meet other soapers as well!

The goal for the first week was Tiger Swirl. Having a Bubble Gum FO waiting to be used, I got the idea that this technique with its elastic, waving look would match the scent well. So I planned to make a pink and white soap with a small green spot to the side. I made a blend of FO/EO´s using Bubble Gum, Cucumber, Peppermint and Rosewood.

I colored one half of the batch with Pink clay, the other one with TD. I left a small part out and mixed in Ultramarine, Yellow oxide and TD to get the green. At first the soap was moving slowly, but while I was adding the colours it started to thicken - so I went quickly to pouring. Now I think I could have waited a bit longer to get the stripes more distinct. I gelled the soap and finished by painting the top with White mica. I could cut it after 12 hours in the mold.


Overall I like the look, the colours came out nice. I enjoy this technique and plan to use it again for sure.


Have a look at other´s challenge soaps - it´s wonderful to see so many amazing creations from all over the world! And it´s so much fun to be a part of it and to share with others. Looking forward to the next week - which is this week - so see you soon!  Barbora

Tuesday, April 2, 2013

My new curing racks

My husband made new shelves for me last week - look at our recent soaps curing!  Before I had the soaps here and there and everywhere...  Thank you!